VOD audio stream vs Live audio stream vs Locally recorded audio stream (plus a discussion about the use of subscenes)
OBS Settings
- First, in OBS: go to
File > Settingsto bring up your OBS settings. - Go to the Audio section
- In “Audio” section: I recommend you set ALL of your “Global Audio Devices” to “Disabled” even the desktop audio and the mic, yup
- Ensure the “Monitoring Device” is set to the specific audio device you want to use to hear OBS things, likely “Default” is fine, or if you want to always ensure it’s a specific set of headphones, set those. I recommend setting “Disable Windows audio ducking” unless that is specifically a feature you want Windows to manage.
- Go to the Output section
- In “Output” section: In the “Streaming” tab: set
Streaming Settings > Audio Trackto “1”, setStreaming Settings > Twitch VOD Trackto enabled (checkmark=yes) and set the track # to “2”. - In “Output” section: In the “Recording” tab: set
Recording Settings > Audio Trackto “3” (uncheck all other numbers) - In “Output” section: In the “Audio” tab: set
Track 1 > Nameto “Live”,Track 2 > Nameto “VOD”,Track 3 > Nameto “Local Recording”, ignore the other tracks (unless you knowingly use them) - Click the “OK” button at the bottom of the window to save all these changes.
Audio Sources
If you have no defined audio sources in OBS (because you were only using the default mic and default desktop output as sources), you will need to define your audio sources.
Let’s use Charmy’s TTS source as an example.

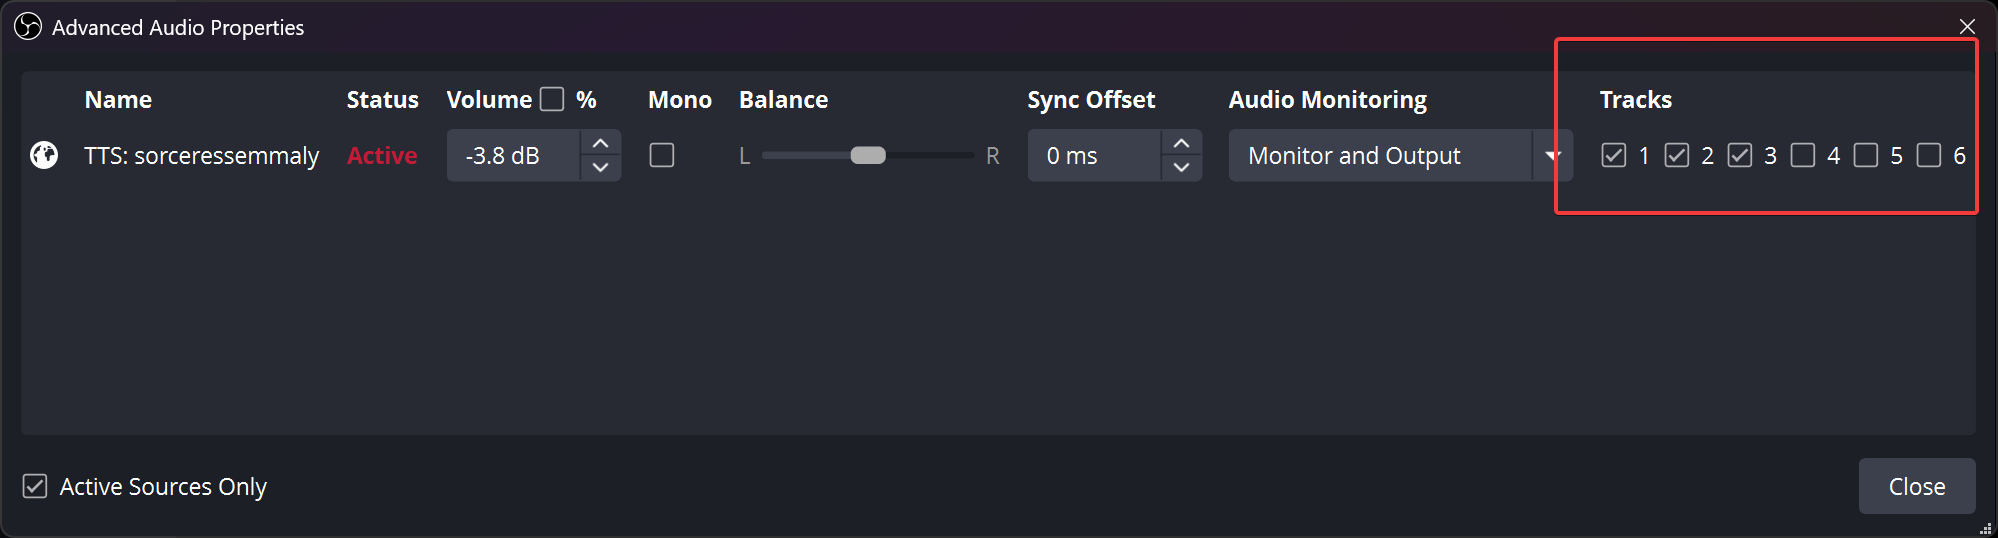
Click the Advanced Audio Properties button (pictured) to open the window of the same name.

In this audio source you can see that I have it set to Tracks 1, 2, 3. This means this audio source will go to Live Stream, VOD, and Local Recording. If I want it to be omitted from VOD, just uncheck #2 and it won’t go to the VOD but it still goes to the live stream.
If you are using specific game capture/window capture sources, just use those sources’ audio to send them to those tracks. If not, you should consider setting up a game capture source and then set the audio as above.
Do the same with Spotify. You can use Application Audio Capture to grab Spotify if you don’t want to use something like a virtual audio cable thing. Then set its audio tracks as appropriate (checking #1 and not #2, and maybe not #3 either)
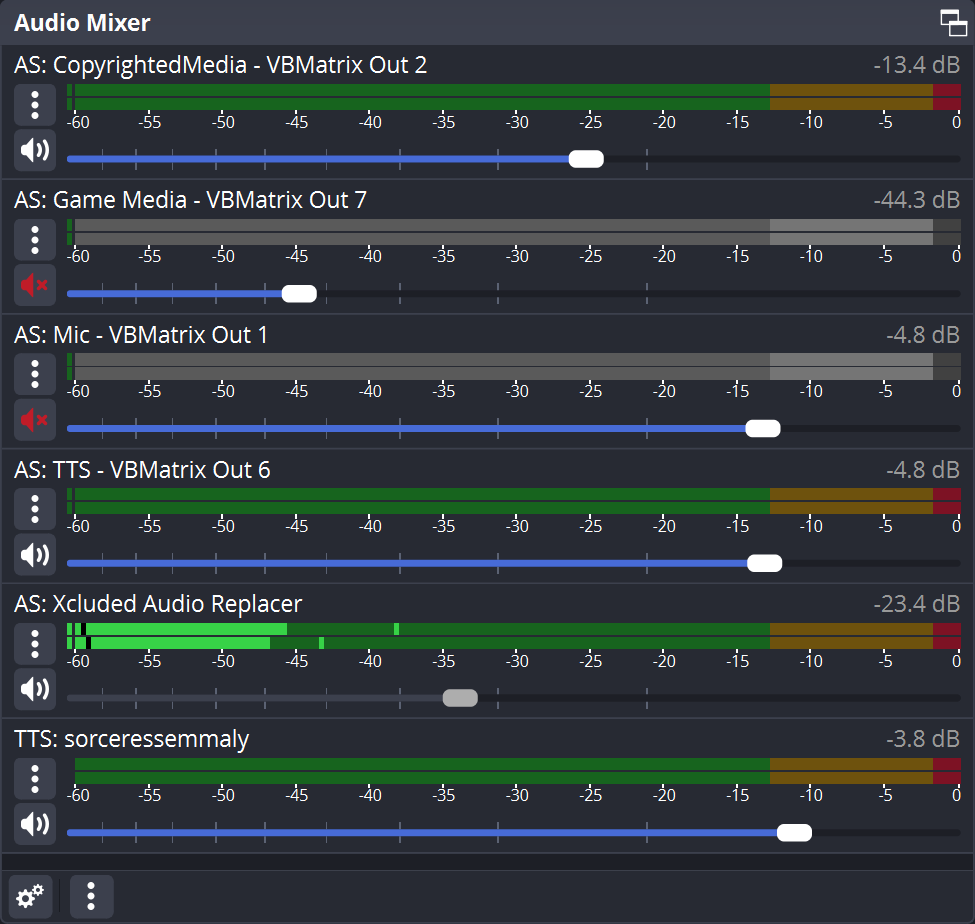
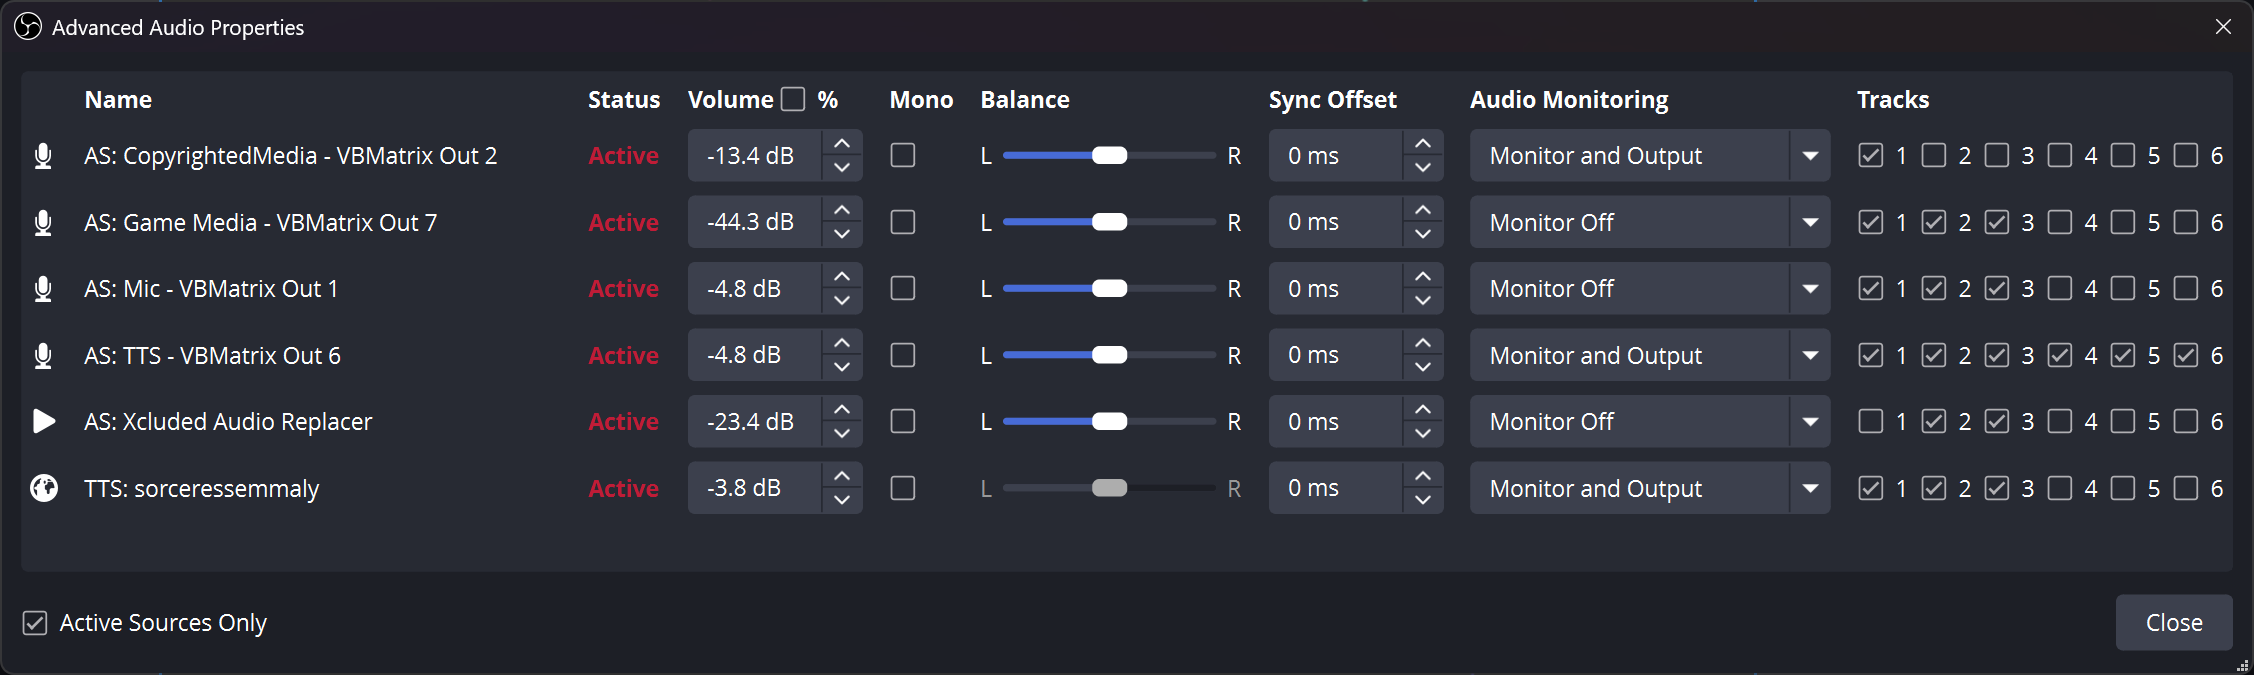
Here’s an example of what mine looks like. I have an audio track called “Xcluded Audio Replacer” which is just background music that is royalty-free so the VOD isn’t just creepily quiet. It ONLY outputs to my VOD track. As you can see in the advanced audio properties for this, the “Xcluded Audio Replacer” is set to only Tracks #2 and #3 and is NOT set to Monitor, and my “Copyrighted Media” (which is a virtual audio cable, but you don’t have to have such a thing!) is set ONLY to track #1, and it’s set to Monitor & Output (because it’s a virtual audio cable; if you are just using application audio capture, you should set it to Output not Monitor & Output).
If you do not already have a MIC input setup, you will need to set up one, but I suspect you already do considering you’re probably able to mute the mic and adjust settings within OBS. Just make sure it’s set to the right audio device inside the mic source entry in OBS (instead of the global settings), and set it to all three tracks 1, 2, 3.